Google Play App Signing can be a confusing process, especially when using Unity to build your Android app bundles (AAB). In this post, we’ll quickly go through the steps to properly configure Google Play App Signing and Unity so that you can successfully upload your AABs to the Play Console.
Unity steps
First, we will create a pair of keystores and keys using the Unity Keystore Manager. Google Play Console may instruct you to create the keys using some other method, but we will use Unity’s tool as we want to avoid any issues with the keystore format.
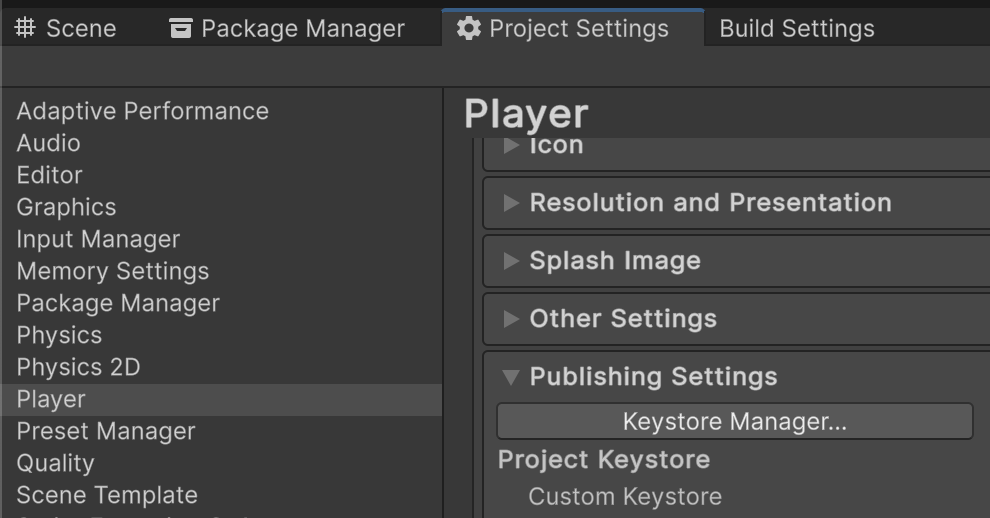
Open your Unity project, and go to Project Settings > Player, select the Android settings tab and scroll down to the Publishing Settings section. Here, click the Keystore Manager... button to start the process to create a new key store.
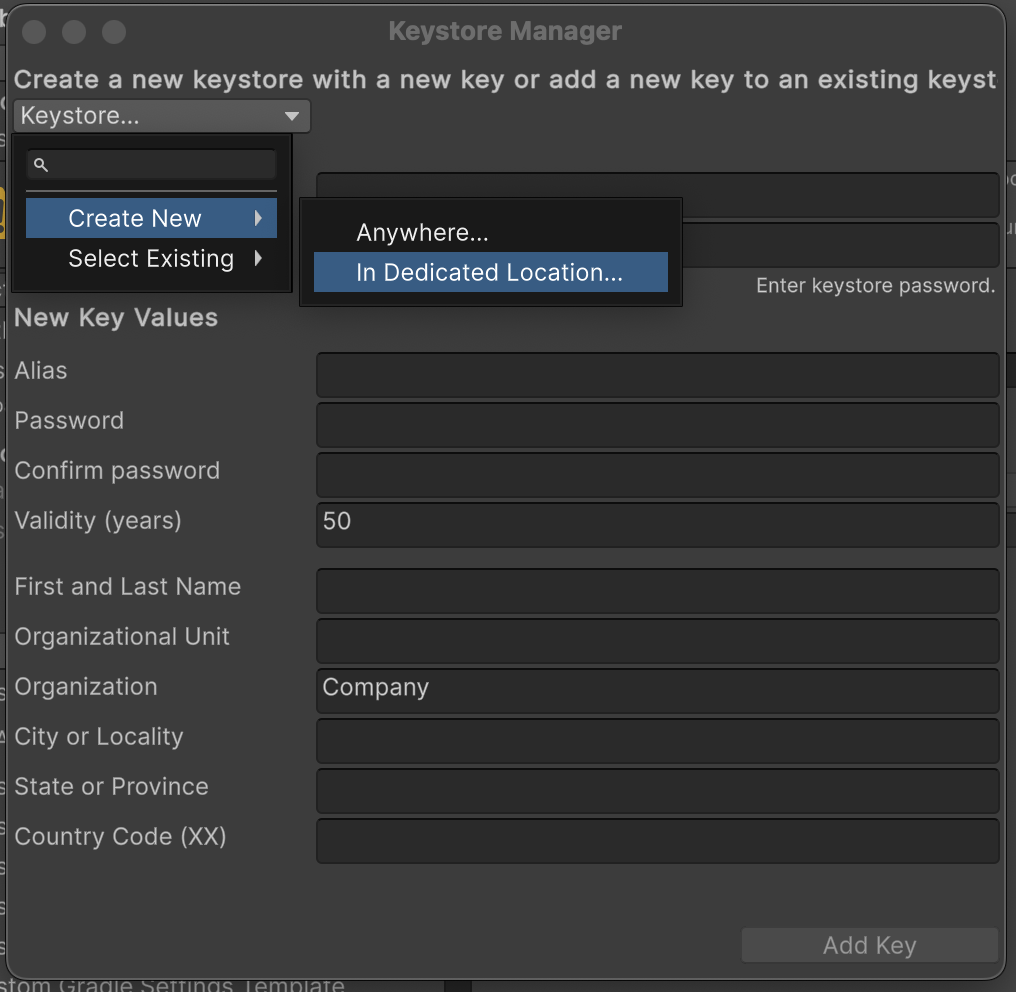
A new popup window will appear. Here, use the “Keystore…” dropdown to select Create New > In Dedicated Location.... Pick where to save the key, and give it a name (you can name it whatever you want).
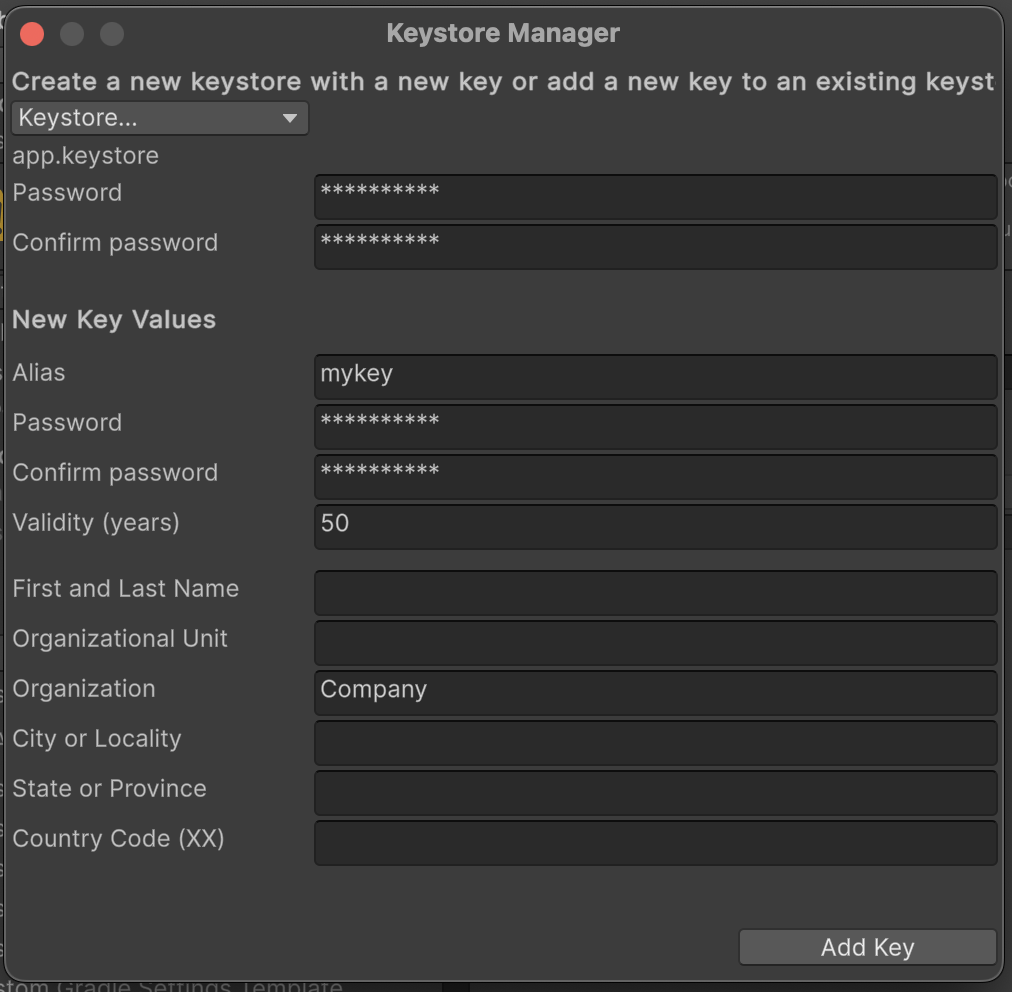
Every single field can be filled, but you only need to fill out the Password, Alias, and Password (for the key) fields, alongside the confirmation for all passwords. The alias can be anything you want, but it’s recommended to use the same name as the key store.
Make sure to keep the key store and passwords safe, as you will need them later.
After the first key has been created, Unity may ask you to set it as the project key. Do not do this. Instead, create a second key store and key for use as the upload key. This key will be used to sign your app bundles.
The upload key can be created in the same way as the first key, but it’s recommended to use a different password for it. The name for the key can again be anything you want, but something like uploadkey is probably a good idea.
After creating the upload key, you must set it as the Project Keystore and Project Key in Unity.
We use a secondary key for uploads, because if you ever lose your upload key, or it’s compromised, you can reset it to start using a new one. The upload key is expected to be used and “left behind” in automated scripts, which could compromise it more easily. Regardless of this, all keys should be kept equally safe!
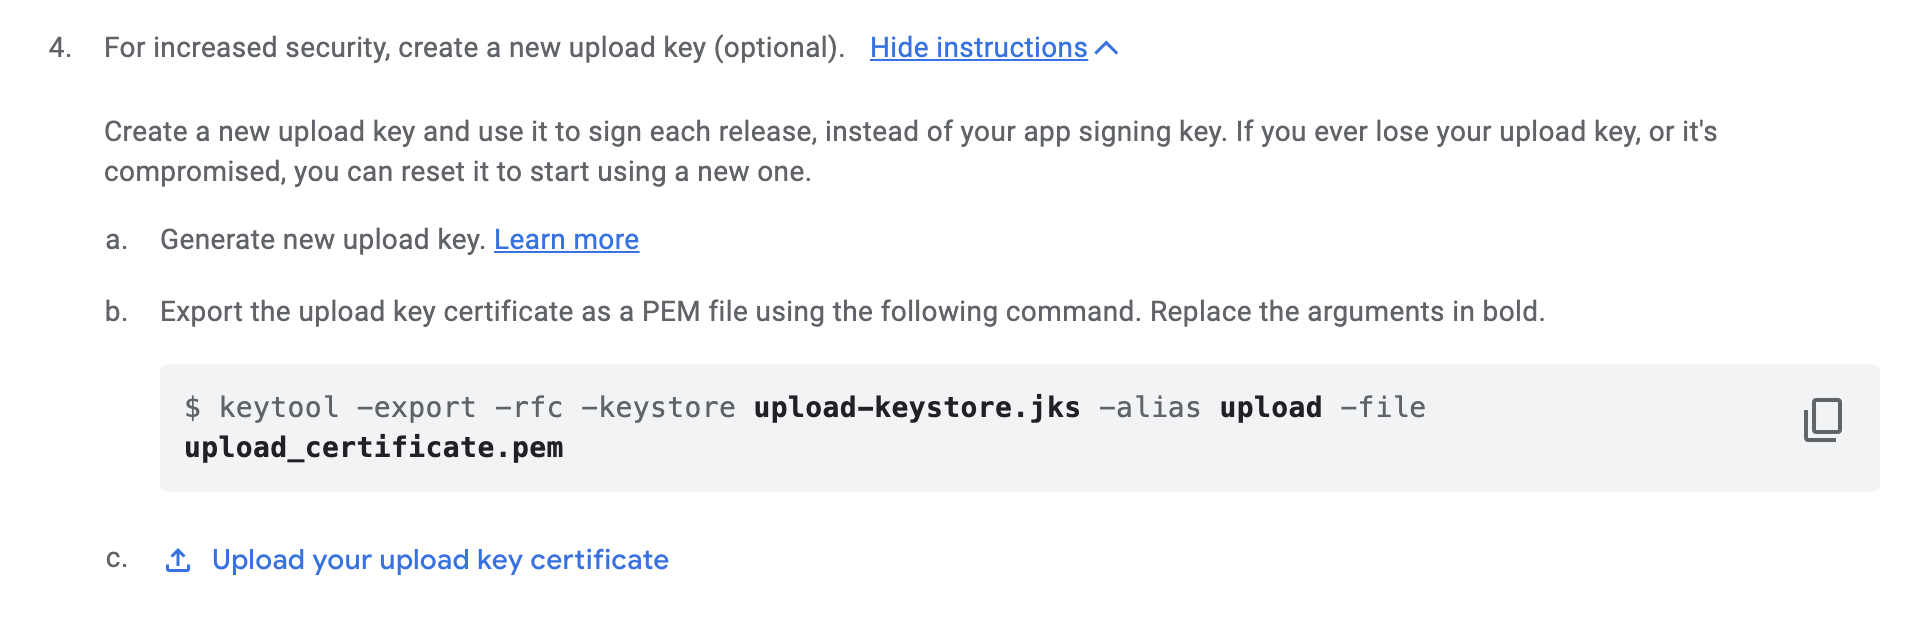
Finally, we need to generate a public .pem certificate of the upload key to upload to Google Play Console. This can be done using the following keytool command:
keytool -export -rfc -keystore <KEYSTORE_FILE> -alias <KEYSTORE_ALIAS> -file upload_certificate.pem
(The keytool binary is part of the Java JDK, so make sure you have it installed.)
Google Play Console steps
We will now go to the Google Play Console. If you don’t have an app yet, create it in the Play Console and start an internal release. We will use it to test the key after everything is set up.
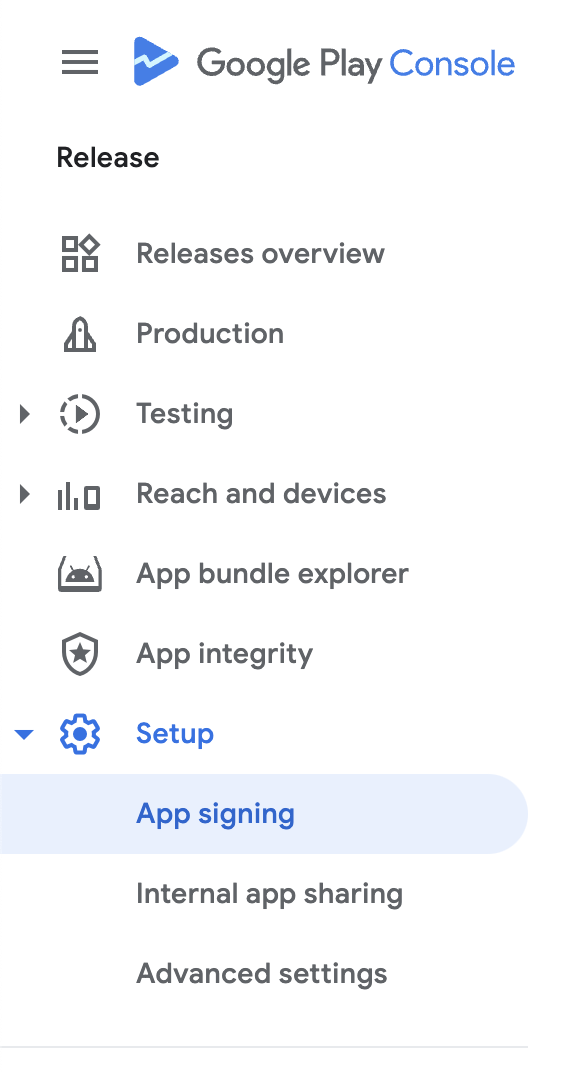
Next, go to Setup > App signing (under the “Release” group in the left sidebar) and find the section titled “Let Google Play manage your app signing key”. Here, select “Use existing app signing key from Java KeyStore”.
A multi-step guide will now appear. Follow the steps, replacing the highlighted arguments with the values from the first keystore you created in Unity.
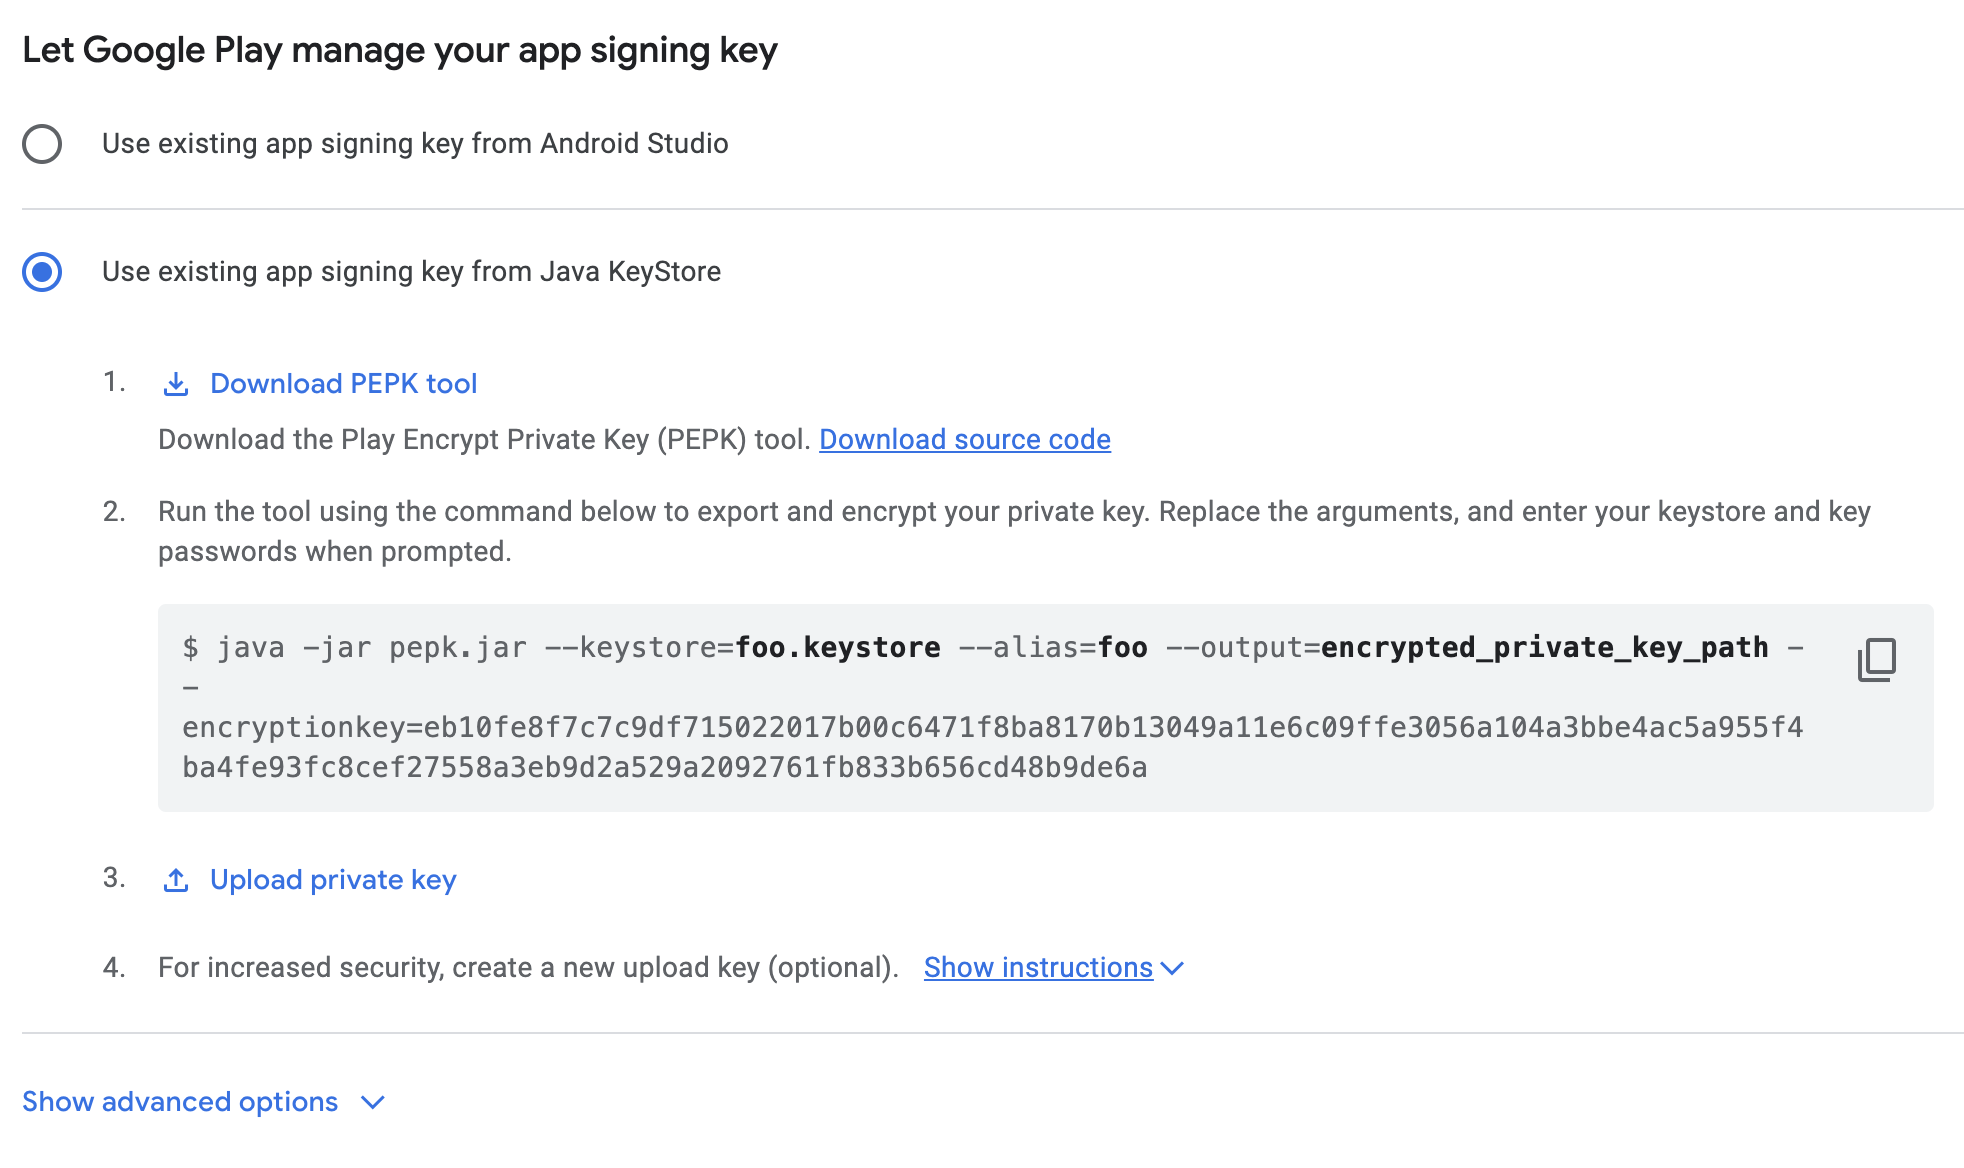
After uploading the first private key, click on “Show instructions” at the last step, to upload the upload key .pem file we created earlier.
Final checks
Before uploading or building any new releases, make sure the following settings are set in your Unity project, or there may be issues when trying to upload the AAB to the Play Console:
Make sure your package name is set correctly in the Player Settings, and follows the typical standard of
com.companyname.appname(lowercase only). Don’t use weird letters or symbols. You can’t change this after your app has released!Make sure you are using
IL2CPPas the Scripting Backend, and that theARM64option is enabled (64-bit builds).In the Build Settings, make sure the “Build App Bundle” option is ticked before building the project.
If the Google Play Console is giving you issues, try temporarily uploading an APK file instead. The error messages are usually more descriptive and can help you identify the issue. Once you’ve resolved the issue, switch back to the AAB file.
Congratulations! Your Play Console should now be ready to accept your AAB files.