On the 23 of February, Steam released Steam Audio free of charge by teams of any size with unlimited revenue. Even though the SDK is free, is not open source, keep that in mind.
The supported platforms are Windows, MacOS, Linux / SteamOS and Android. Also, Steam Audio doesn’t require the game to be on Steam or use any VR headset at all.
I will go over some of the information about Steam Audio, but you can read the full announcement on the Steam Community.
What is Steam Audio?
Steam Audio is an advanced spatial audio solution for games and VR. Uses physics-based sound propagation on top of HRTF-based binaural audio to generate immersion.
In simple terms, replaces the 3D Sound System that Unity currently has built in. The SDK has a ton of features, some of them listed in the image bellow.
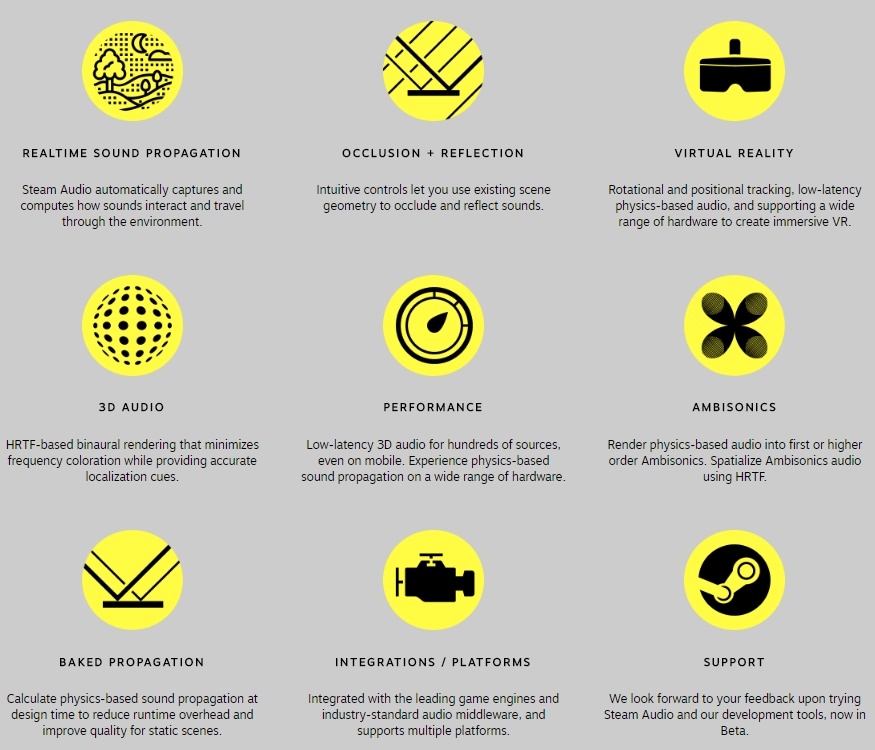
On this post I’ll go over some of the most basic usage and implementation to give realism to sounds in-game, without the need of modifying your scene.
Unity Integration
Steam Audio has been released for Unity (using a Unity package) and for C with an API for custom engines. It also contains a user manual, but I’m writing this because with the manual I wasn’t able to make it work.
At the time of writing the current version is 2.0-beta.2. You can download the current beta version here.

Inside the zip you will find the folders bin and doc. We will not use the user manual, but that doesn’t mean you should delete it! If you need the manual again, it is available on the same download page as a separate download.
Before we continue, keep in mind that all the code is written in C#.
If you are still using UnityScript (or wrongly known as JavaScript) you should definitely learn C# before using external packages. It’s not hard at all if you understand UnityScript and will allow you to use other languages in the future.
Inside bin you will find a folder named unity and two Visual C++ Redistributable executables. If Visual Studio is installed, chances are that the vc_redist package is already on your system. If you are not sure, execute the one you need (x86 = 32bit and x64 = 64bit) and try to install it. It won’t allow you to do it if you already have it.
Now let’s import the Unity package, found inside the unity folder.
If you never used a Unity package before, the package will open Unity and prompt you to import it.
For some reason, the SDK is called Phonon. Probably the name given by Impulsonic, the original owner of the SDK before Steam bought them.
When importing, select everything inside the Phonon folder. About the Plugins folder, you can choose to import all platforms, or deselect the ones that you will not use. If for example you will not export your game for Android, you can avoid importing the android folder. You can always re import any platform at a later date.
Unity Scene
The Unity package doesn’t include a demo scene, therefore you will need to create one. A simple corridor or room with an Audio Source in the middle will do. You can also use a current scene with a similar layout.
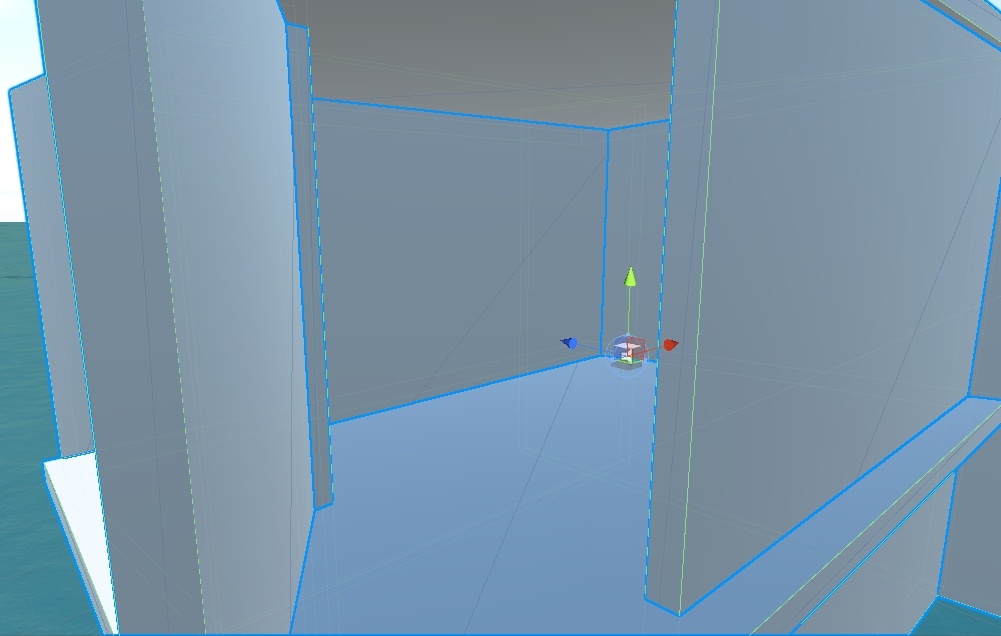
The Audio Source can be placed on an empty object, but I recommend to create a simple cube to see the position of the audio.
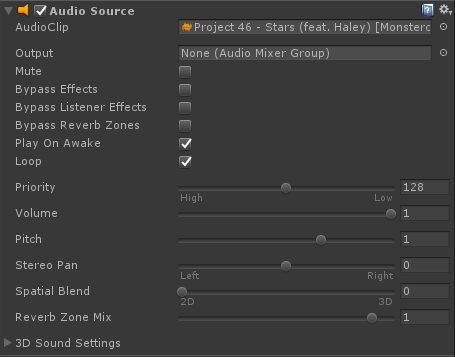
In the example I’m using a song, but you should use a repetitive audio with a wide range for better results.
Add an audio clip, and maintain Play On Awake and Loop activated. Remove Spatial Blend (set it to 2D), this is the 3D Audio that Unity includes.
Spatial Audio manages the stereo audio volume (which side should be playing the audio) and the distance to the source (volume).
As for everything else, keep it in the default value.
Phonon Configuration
To configure Phonon, go to Window > Phonon. This will display a Unity window, remember that you can dock it anywhere.
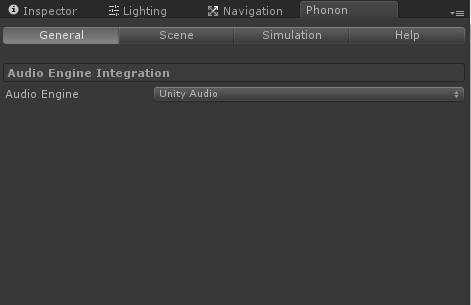
After displaying the window, a new GameObject will get generated (Phonon General Settings). Every time a change is made on any section of the Phonon window, the designed GameObject will get updated.
The General section allows you to choose the audio engine that will be used. Since Steam Audio is in beta, the only available is Unity Audio. Support for Fmod and Wwise is coming.
Scene will allow you to set the default Material Preset for the audio collision. The SDK includes many options like wood, metal or glass. A custom option is also available for custom (duh!) parameters. For now leave it in generic.
Simulation allows you to modify the quality and reduce CPU usage, if needed. Let’s use the High preset for now.
Help includes a link to download the user manual, again.
As explained before, changing settings will generate GameObjects on the scene. To be sure a scene is ready, check if the following objects exist in yours:
- Phonon General Settings
- Phonon Material Settings
- Phonon Simulation Settings
If something is missing, return to the Phonon window and change some settings to regenerate the objects.
3D Audio (HRTF-based 3D audio)
Including only 3D audio is the simplest way to compare the Unity approach versus Steam Audio. Is also very simple.
Return to your Audio Source GameObject and add the Phonon Source Component.
To add a new component, go to the bottom of the inspector, click the Add Component button and search for Phonon Source Component.
This component will modify the audio from the source and compute the 3D audio. To only use 3D Audio, disable Reflections or you will have no sound at all.
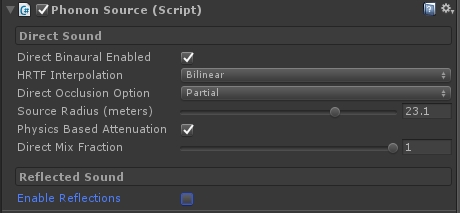
Direct Sound holds all the configuration for 3D Audio. Enable Direct Binaural to enable the HRTF-based 3D audio.
On HRTF Interpolation you can choose between Nearest or Bilinear. Nearest will calculate the sound distribution based on distance, as for Bilinear will do the same but using 4 directions. Bilinear will sound smoother on rapid turns of the camera, but will consume more CPU. I can’t see a difference in performance, but could be a problem for less capable platforms, like Android.
Direct Occlusion Option allows to work with mesh collision. Since we want to have only 3D Audio, set this to None.
Physics Based Attenuation will lower the volume based on the distance of the camera and the Audio Source. This is what Spatial Blend does when set to 3D, in the Audio Source component. If the scale of your game is bigger than normal (don’t do that) or you feel that the audio goes quieter at a small distance, disable this option. Since we are not using reflections or occlusion, the audio doesn’t bounce, and that can result in an overall low volume. In this case, set Spatial Blend on the Audio Source back to 3D and modify the 3D Sound Settings at your discretion.
Do this if you are only using 3D Audio by itself. If you are using occlusion or reflection this trick will probably brake the immersion. Also, set Doppler Level to 0, or your sound will get distorted during movement.
Finally, Direct Mix Fraction controls the priority of the sound over others. If you only have one Audio Source this will act as a volume slider. But with multiple sources this will lower and rise the volume accordingly.
Remember that you are still using an Audio Source. You can change Pitch or Volume and will still have an effect on the sound.
With this, Steam Audio is now implemented on your game. To compare between Unity and Steam Audio, enable and disable the Direct Binaural option under Direct Sound.
Everything under Direct Sound can be accessed during runtime by script or on the editor inspector.
Hit play and try it!
If you didn’t assume it by now, to see a difference you must wear decent headphones.
A pair of speakers will not do the job. But, maybe a nice 5.1 or 7.1 setup will.
What’s next
We are still missing occlusion and environmental effects, as well as audio reflection and how to bake sound areas. This is the simplest way to get Steam Audio on Unity, at a near zero cost on performance and outperforming Unity system by far.
Now go ahead and change everything until you eventually break it, and need to read this again!