A disclaimer before continuing: We will go over how to build and tests iOS apps in device without the need for an Apple Developer account. If you already have and pay for a Developer account, the process is similar to get apps running in device, but there are better options (like TestFlight) available for your case.
Requirements
To make this work, we need the following:
- Apple ID account (the one used in your iOS device, for example)
- MacOS 10.11 or higher
- Xcode 7 or higher (latest current version is highly recommended)
- A testing device running iOS or iPadOS
I assume you already managed to build your game for iOS, and now you are left with an .xcodeproj file and no idea what to do next.
Xcode configuration
First, we need to configure Xcode to link it to the Apple ID account that will be used to certificate builds. In case you don’t have an Apple ID account (you probably do), you can create one in the Apple ID site.
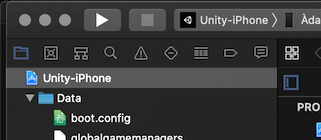
Let’s open Xcode. You can do it by opening the Unity-iPhone.xcodeproj file Unity created as part of your build.
- In the top menu, click on
Xcode > Preferencesto open the preferences window. - Select
Accounts. This tab contains all linked accounts (including Apple ID’s) configured in this instance of Xcode. If you never added an account this list should be empty. - Click the plus sign in the bottom-left corner to add an account and select
Apple ID.
After following the login process, the Accounts tab should now contain your Apple ID, and unless you have a payed Apple Developer account, the only listed team should be your name (or the Apple ID name) followed by “(Personal Team)”. This is your “free” auto-generated Apple Developer Team.

Certification & deployment
Time to certify the built app and install it on the device.
- Select the
Unity-iPhoneproject at the top of the list, this should open theGeneralsection. - In case there is a warning under
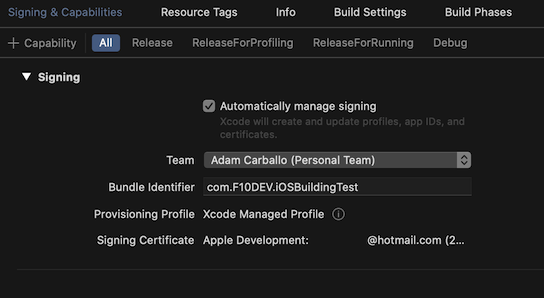
Identity, you probably don’t have a certificate yet. Click on theFix Issuebutton and follow the instructions to create a certificate. - Now, select the
Signing & Capabilitiessection, and set your personal team as the certificate team. This should automatically remove any alerts.
Done! We now have the Xcode project signed and certified using our personal team. We can now run the build and deploy the game to the device.
Make sure the device you want to use is connected directly to the computer or configured to support network deployment. Click the play button to start deploying the build. Keep in mind your device must remain unlocked during the process.
Once the deployment is complete, your game should show up on your device like any other app.
If the app doesn’t open, or you get a warning regarding “Untrusted Developer”, you must tell your device to trust your Apple ID’s certificate. On the device, go to
Settings > General > Device Management > Developer App > (your game's name)and trust your certificate.
Conclusion
Sel-signed / free Apple ID certificates are pretty useful for quick testing apps without having to deal with teams or Developer accounts, but are pretty limited. Without a payed Apple Developer account, you won’t be able to use in-app purchases or Game Center functionality, so keep in mind this method just allows quick testing.
Also, if your app randomly stops working after a while (and you didn’t program some time-related stuff wrongly) your certificate probably expired. Personal team certificate apps have a limit of 7 days, after which they will stop working, and require a new build to keep working.